Friday, November 19, 2010

An Organized Linen Closet

Wendhurst Castle has been our home now for two and a half years. In that time we've fixed up a bunch of the rooms, and we're working on a bunch more of them. (Like always) So there is always renovation going on, but one of the less talked about things I am always doing in our house is finding ways to make it work better for us. I remember when we moved in, because we were working on so many rooms at once, we put all the boxes into the dining room. Then, after they were unpacked, and the items placed in their appropriate rooms, I lamented to Lover the fact that we actually had less storage in this new house than we had in our apartment. Lover looked at me like I was insane. To his credit, the house has 1,600 square feet plus a finished basement and attic, effectively making our square footage closer to 3,000. And our apartment had about 700 sq ft. So I do see his point. But, in my defense, the problem was I hadn't figured out how to use this new space efficiently. Yes, it had tons more room (especially storage room) but I hadn't yet figured out how to make it work for us.

That's a long winded way of telling you that I recently revamped our linen closet, and I love how it's working out.  It took me two and a half years to figure out how to best make it fit our needs, and while I am sure that I will continue to tweak it in the future, for right now it makes me absolutely happy.


One of my biggest hangups, oddly enough, is that it is called a linen closet. See, we have huge, deep builtin chests in the bedrooms that store all our extra sheets and blankets. But our bathroom is super duper small, so there's lots of extra stuff like toilet paper, hair dryers and extra soap that doesn't fit in the bathroom. Do you see where I am going with this? I needed to convert the linen closet into a simple storage closet.


(the before)


Now you might think that when I say "convert" I meant a massive construction overhaul. Actually, I didn't change anything about the way the closet is laid out. The shelves are exactly the same. I just changed how I stored things on the shelves, what I stored in there, and most importantly, how I thought of that little closet. I know, I am weird. Whatev. :-)

Okay. Back on task. A while back Jen from A Thousand Words suggested that I buy bins that were the depth of my very deep shelves and use those to corral everything inside them. This was a brilliant suggestion. I found the perfect blue and brown, lightweight ones at Lowes, and hauled them home to try them out. One corrals toilet paper, and the other wrangles all the unwieldy hair stuff - hair dryer, curling iron, clippers, etc.


The towel shelf got a makeover when I put our infrequently used beach towels behind our regular towels, so that now the ones we use regularly are front and center.

Toiletries are corralled into four smaller bins on the top shelf, and small toiletries like new razors and sundries are in two teeny baskets at the very top.


The bin at the very bottom holds some miscellaneous decorating supplies. I used to have a bin of decorating stuff for every season, but now I've pared down quite a bit, and I just have one for fall. So this one in the closet holds miscellaneous other decorating baubles. It's working out perfectly so far. :-)

So that's the story of how I managed to find a sliver of organization in this huge house that "has no storage" ;-) I know, I'm crazy, but I have to say, I love how this little closet is working out for us. Oh, and the best part? Somehow I managed to free up two vanity drawers during this overhaul. Who hoo! :o)

Monday, November 15, 2010

Dare to be... Thankful!

Well, you know what they say, better late than never, right? I am fashionably late to the Dare to DIY party at Kim's, but I am so excited to be participating again this year! :-)


This week's theme was:

Dare to... be thankful! by making a fun Thanksgiving project. I chose to make two simple little Thankful notecards to be sent out to friends that I am especially thankful this year.


One of the things I love about scrapbooking is that I always have a boatload of crafty supplies laying around that are perfect for whipping up little notecards and the like. This first card is made out of card stock, regular paper and dollar store glitter glue. I love how the little pumpkin turned out, even if it is a little lopsided. :-)


The second card was super easy as well. The paper was two sided, so I simply trimmed the fold so that the under side showed, and added a "metal" plate that says Give Thanks. It's much easier to read in real life. Trust me.


So there you go. Simple and easy, but hopefully they will make someone's day. I am so thankful for friends! :-) Make sure to go check out the other girls' awesome crafts!

Monday, November 8, 2010

Fall Mantel Decorating


I have to say, I am loving the fall mantel that I created this year. Last year, if you remember way back then, we had just finished up the living room's multiple projects, so I didn't feel like covering up all of our hard work with fall decorations. But this year, after enjoying the work of our hands for over a year, I was ready to change things up a bit. I generally change the mantel a few times a year, but I also usually work with the same elements, so things don't look terribly different. This time my goal was to change things up quite a bit, achieve a fall feel, and not spend any money. :-) Here's the result:


I love how simple and clean it is. The geese silhouettes are just cut out of cardstock (I printed out silhouettes I found online and transfered them to cardstock.) The grass is from our backyard. I've had the picture for forever, it's a print of The Gleaners by Jean Francois Millet - this one:

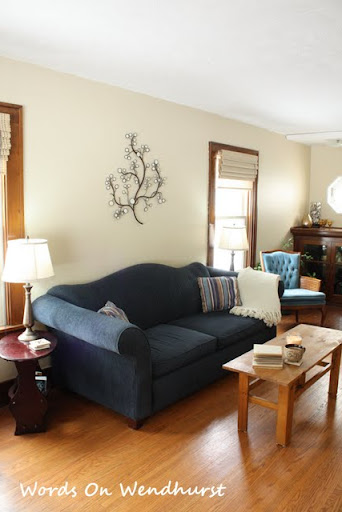
I've always thought is was beautiful, and it reminds me of the story of Ruth. The rest of the mantel is just stuff I've collected, that all seemed to go together. One of the books is Kidnapped by Robert Louis Stevenson. I hope to read that this fall, as one of my six classics I'm trying to read this year. (I've read three so far)

I also love the little grouping on the right of the mantel. Again, it's just some books, a photo of Lover and I, and some Dollar Tree ceramic pumpkins. But I love it. Maybe it's because it's Lover and I, and that makes me smile. Dunno, but I know that it makes me smile every time I look at it.


Sorry for the not so great pictures. I promise to try and take better ones in the future :-) Have a wonderful day!

Friday, November 5, 2010

When I have a million hours of free time...

Whenever I get caught up on my current list of fun projects, I am going straight to this post for my next set. Here's what caught my eye this week:

Modern Family Tree


I am obsessed with genealogies and our family tree. I would love to sit down with the grandparents on both sides of the family, and pick their brains for all of the family history they can recall. In a totally non-Sylar-picking your brain kind of way. :-) I love how the tree became three dimensional with the addition of the frames over the vinyl tree. I especially love that Natalie made the vinyl decal herself! Awesomeness!

Canning Jar Soap Dispensers


I'm always a fan of repurposing something, and I also love using pretty glass to hold my liquids (like my makeup remover), so you can imagine how much I love these blue canning jar soap dispensers! They look easy enough too, and how cute would they be beside your bathroom or kitchen sink? Jan even has a few for sale in her Etsy shop, if you don't feel like making your own.

Upcycled Sweater


I shop for all my clothes almost exclusively at thrift stores now. I have so much fun, and I feel like my wardrobe is much more me and eclectic. Sometimes though, there's a certain new trend I like that hasn't made its way to the thrift stores. Sara shows you how to makeover a large men's sweater into a trendy sweater dress! And it's only a couple of seams for all you sewing-phobes. :-)

And now for the grand finale of my finds this week - a faux capiz chandelier!

DIY Capiz Chandelier


Erin spent a little bit of money, and a lot of bit of time :-) to make this super convincing knockoff capiz chandelier. I'm thinking that it would be super easy to adapt this idea for any size light that you might want in your home, and I am specifically considering this for my far-off-in-the-future office.  The "shells" are made out of wax paper - how cool is that?

So that rounds up this week's inspiring projects. And someday when I think "gee, I have nothing to do today!" I will know right where to go for more ideas! :-) Yeah, right, like that day will ever come....

Wednesday, November 3, 2010

Fall Pictures and Christmas Deals

I'm sure you will recognize this pretty little girl. We had so much fun exploring a new location, and Makayla is such a doll! Her monkey costume was perfectly suited for her personality! :-)


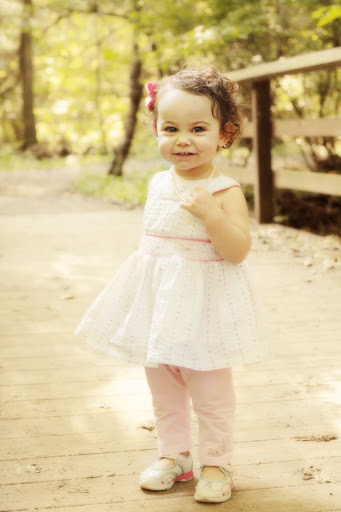
We're also offering some special portrait sessions for your holiday cards. Here are all the details:

I am only offering a few of these slots for the holiday season, so if you are interested in booking a session for your Christmas cards, make sure to do it right away!

Monday, November 1, 2010

Sewing pillows and other little changes

One of the things I am enjoying these days is being able to make small changes to my home, without having to embark on enormous renovating projects. Because we have the downstairs pretty much the way we want it, when I get the urge to change something up, it is as simple as swapping out throw pillows or creating a new mantel display.


When we went to NYC in the spring, I found a beautiful upholstery fabric that I knew would make the perfect pillows in our living room. I loved the creamy background, and the graduated color of the brown overlay pattern. And although it took me six months to find the time to make them, it was so worth it. Pillows are simple enough to sew, the only complication with these pillows was that I wanted the rope trim around them (kinda complicated sewing) and a zipper in the bottom. Not terribly difficult things, but they definitely made the project time longer.


I found the rope trim and the soft backing fabric at Walmart. Don't forget to check and see if they have what you are looking for, this same trim, purchased for 1.50 a yard at Walmart was 7.99/yd at JoAnns. Thanks Walmart!

I really like how the lighter pillows look against the dark blue couch. And I really like that I made them myself. :-) Here's what the room looked like with the previous stripey pillows:

And now.

We picked up that rug at Lowe's for $30 a few weeks ago, just to have a rug down for the cooler months. It's working out fine so far, until we find the "keeper." Don't you just love little changes?

Have a wonderful day!