Thursday, December 24, 2009

Merry Christmas!


From our castle to yours, we wish you a very
Merry Christmas!

I'll be taking the next week or so off of blogging to enjoy the holidays. I plan to be back in 2010 in force!

Monday, December 21, 2009

Dare to DIY: Christmas Traditions


Sadly, the Dare to DIY party is drawing to a close. I've had so much fun with these posts each week, and even more fun exploring all of the wonderful creations that everyone came up with. Thanks to Kim for hosting each week!

This week's challenge was to share the traditions that we already uphold, or the ones that we are starting this year. I am a big one for traditions, so you can bet that I'll have lots of share.

Celebrating on Christmas Eve Lover's family has always celebrated on Christmas Eve, so most of the time we spend at least part of the day with them. Lover always jokes that he was quite old before he figured out that Christmas wasn't on the 24th. :-) This makes me happy, because we can then spend a quiet Christmas morning together.

Decorating the tree This year we began a new tradition, of waiting to put the ornaments up until Christmas Eve. The tree is currently decorated with lights, balls and ribbon, but all of the sentimental ornaments are patiently waiting for the 24th in a pretty box under the tree. I'm hoping to blare some Christmas tunes, put out some treats, and have a smashing good time.

The dark side of the tree. Several years ago my brothers started this tradition. Someone gave us some seriously weird ornaments, and they jokingly placed them on the back of the tree, dubbing it the "dark side." The tradition has stuck, and now we place all of the questionable ornaments on the back of the tree. So much fun.

Watch Christmas movies. Up until 2009, our tradition was to watch It's a Wonderful Life. This year we ditched the old classic *sniff* in favor of our own favorite Christmas movies; Home Alone, Elf, and While You Were Sleeping. We're trying to do this in lieu of an Advent wreath, so essentially one movie a weekend.

Dr. Seuss' How the Grinch stole Christmas. It's a bit of a joke around here that Lover is a Grinch when it comes to Christmas. (Although in his defense he has been so, SO much better this year) We started watching this heartwarming tale last year on the 24th, and plan to do so again this year.

Grinch ornaments. By chance, the first year we were married, I was out shopping the day after Christmas and I found a clearanced Grinch ornament. I bought it as a joke for Lover (see above) and the tradition has stuck. This one does take some work though, as it is apparently very difficult to find a Grinch ornament each year. It may also be because we have strict guidelines. We have to purchase the ornament around Christmas time, we must be together, and we have to go to a physical store, not shop online. It really is a lot of fun, regardless.

12 days of Christmas. As most couples do, the first year we were married we lamented the fact that we didn't get to have our "own" Christmas together. So instead, we gave each other a few small gifts in the days following Christmas. The second year we turned that into a full fledged tradition, buying five small gifts, one for every day after Christmas. Eventually our plan is to give each other one gift each day from December 26 through January 6th. (The day they celebrate Christmas in Spain, where we both grew up) This year we are up to 7 gifts. We keep a $5 limit for each gift so things don't get too crazy. It's my favorite tradition of all the ones we keep, and I look forward to it each year.

So those are the traditions we keep here at Wendhurst Castle. It's been fun to hang out with all you fun peeps, and I've had so much fun finding all sorts of new blogs to add to my reader. Have a Merry Christmas!

Images found through images.google.com

Friday, December 18, 2009

Friday Favs: Christmas Decorations!


I love getting our house all decked out for Christmas, with poinsettias, lights and little sentimental knicknacks.We put a little tree up at the top of the stairs, and it fits perfectly in the little nook of the landing. It was a Black Friday steal that a friend picked up for me, and I had fun getting it all decked out in reds. There's red balls, red apples, cardinals and poinsettias in just about every nook and cranny of that tree.


In the dining room I went with very Christmas-y colors, and lots of glitz and glamour. The table is set with a fruit bowl with a pretty wreath around it, on a red tablerunner. I put little red candles on either side, surrounded by berries, and decked out the table with red and green chargers, silky red napkins and poinsettia napkin rings.


The antique dresser/buffet is loaded with little boxes that look like presents, and the shelves above it got their own decorations in color scheme appropriate colors.


The bookcase is showcasing our new stockings and the angel holders, both Christmas clearance items I picked up last year. I like how they lighten up the dark case.

On the piano in the living room I've got candles galore, and our nativity scene. I need Lover to build me a creche, but we didn't get around to that this December.

The tree is beautiful, and I am so in love with the topper that I found at Goodwill. It is a 12 pointed star with translucent panes, that let the light shine through. So pretty. It's hard to tell, but we hardly have any ornaments on the tree. We're saving them for Christmas Eve.

The mantel is my favorite part of the decorating this year. I put up a garland and spruced it up with some pinecones and picks, and then tucked glass candleholders all throughout it. The two hurricanes on the ends are holding tons of gold ornaments, and the gold mirror reflects all the light and sparkles and bounces them around the room. So pretty.


So that's my little holiday home tour. Hope you enjoyed it, and more importantly, I hope you enjoy the holiday Season. Merry Christmas!

Wednesday, December 16, 2009

Stephanie's Bedroom Suggestions


Stephanie asked me for some quick design suggestions for her master bedroom. I took a few minutes last week to come up with some simple ideas for bringing in a fresh new look to her room.

Stephanie's master bedroom has medium colored hardwood floors, dark espresso furniture, three windows in the room and Benjamin Moore's Dunmore Cream on the walls.

I came up with three simple options for her, each showing a comforter, some curtains and a rug, along with the color swatch of Dunmore Cream to show how each option would work with the room color.

Option 1 would be easy to implement, and would be light and breezy. I would bring in a few woven elements and some sparkly glass bowls and candlesticks to finish it off.

Option 1: Blues and Grays

Option 2 is much more saturated and dramatic. Because of the windows and light wall color, you can definitely pull off the darker rug and duvet. If you like deep colors, do the red curtains, otherwise do the linen colored curtains. Throw a few cinnamon and orange pillows on the bed to bring some color to that side of the room.

Option 2: Warm Reds and Browns
Warm Tones Curtains (in linen)

Option 3 is a classic, timeless style, with a monogrammed duvet and a fun rug. The curtains are white Vivan panels from Ikea, but you could do any simple white panel. Keep the accessories simple and elegant.

Option 3: Classic Neutrals

Sunday, December 13, 2009

Dare to DIY: Simple Christmas Card Display

It's week five of Dare to DIY over at Newlywoodwards. This week's challenge was to make something new to deck your halls.


For the past several years I have taped the Christmas cards that we receive up on the wall in our dining room. It looked cute, but also kind of cluttery, and by Christmas I was always ready to yank them all down and throw them away. So I started looking for something I could use in a new way to display the Christmas cards.

In our living room we have a little sliver of wall next to the window that I never know how to decorate. I've yet to find the right piece of art, or whatnot to put there. Usually it just stays empty. So I thought it would be the perfect place for a fun Christmas card display.

I had an old cork board up in the office that I thought would work for this project. I'm trying to wait to buy Christmas decorations until after the holidays this year (not that I'm crazy about the selection this year anyways) once everything goes on sale, so I knew I would be making this myself.


While in Joann Fabrics for the umpteenth time this month, I saw a wrapping paper display that was 60% off. I found this pretty white paper with gold designs on it and knew that it would work for this project.

I wrapped the board as if I were wrapping a present, using regular Scotch tape to adhere it to the back of the board.


Then I raided my ribbon stash for a gold ribbon, and attached it to the back of the frame with little thumbtacks.


Two seconds later it was hanging from the nail in the wall,


and displaying the cards we had received so far.


Simple, cheap and chic. I love it, and the best part is I can change it up each year to accommodate the color scheme I'm using then. What have you made for Christmas?

Linked to Metamorphosis Monday @ Between Naps on the Porch

Make it for Monday @ Cottage Instincts

It's So Very Creative @ It's So Very Cheri

DIY Holiday Highlights @ The DIY Showoff

DIY Day @ A Soft Place to Land


Friday, December 11, 2009

Friday Favs: Thrift Store Shopping

One of my favorite places to find unique decor on the cheap is a good thrift store. Here in my town we have several really good Goodwills, a few Volunteers of America and a Salvation Army. As far as I know we don't have any independant stores. Goodwill is by far the one that I have the most luck at. I'd say 85% of my wardrobe comes from Goodwill, and most of that has been brand new clothes with the tags still on them. So I end up only paying a few dollars, but still get the clothes brand new. Works for me!

This was my go-to outfit this summer, a pretty green shirt and some oh-so-comfy gauchos, both from my nearby Goodwill. Both cost me about $4.00.

Then there are the major scores like this silver trashcan that I blogged about a while back.

Most of my blogging projects come from items that I've picked up at Goodwill. I've talked about the candlesticks I made over, the little box that I painted for the living room, my solution for jewelry on my dresser, and a centerpiece made from a tray that I transformed.

I've also picked up a few decorating items that were pretty enough on their own to hang out in our rooms. The glasses and candleholder in this picture are all from Goodwill. (The lantern is from a garage sale this summer.)


The key to finding treasures at thrift stores is taking your time. I go to one probably once a week. When I am doing clothes shopping I will spend a few hours picking out clothes and trying them on. When I am looking for decor, I'll do a quick sweep, making sure to look on the bottom racks and behind other things. Don't despair if you don't find anything on each trip, I've left emptyhanded many times, but other times I've really scored. That's part of the fun!

What's your favorite thrift store score?

Thursday, December 10, 2009

Good Morning


"The greater danger for most of us is not that our aim is too high and we miss it, but that it is too low and we reach it" - Michelangelo

Wednesday, December 9, 2009

Wendhurst Castle's Christmas Wish List

Oh the stories this old house would tell, if it could talk! I am sure it has lots of tales of Christmases past, both good and bad. I am also sure that it has horrible ghost stories of the "remodeling" that was done to it throughout the years.

That said, I've put together a list of the items this house would like. Because we all know that all houses have personalities and of course care about the things in them. :-)

First up, for the living room, would be a new love seat to replace the current one whose exact twin lives in the waiting room at the local oil change shop. Ew. Ugly oil change couch would be replaced by cozy and stylish loveseat.

Also, for the living room, new end tables. While the current ones match, they are a little rickety. They're also very small, and contain only open storage. We're looking for ones with drawers and shelves, to soothe my organizing heart. I mean, to make this house happy.

For the dining room, a new set of chairs. The castle would like chairs worthy of its elegance, not dated, falling apart, mismatched chairs like the current ones. Something like these would be nice.

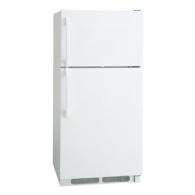
For the kitchen, the castle requests a new fridge with a working freezer, so that the occupants of the castle may freeze things upstairs or down, thereby making their life easier. Who's ever heard of roughing it in a castle?

For the bedroom, and because castles have no concept of money, two nightstands like this beautiful carved Moroccan side table. They'll add just the right amount of ambiance and romance to the room.


Also for the bedroom, a large, pretty rug to warm up the toes of the couple that takes residence in the master "suite." This rug is really pretty and isn't too terribly expensive.

For the office, the castle requests a small antique loveseat that has been reupholstered in a fresh white. This will encourage plenty of lounging and relaxing in one of the sunniest rooms in the house.


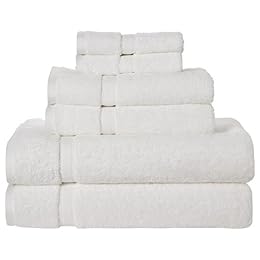
For the bathroom, a set of fluffy white towels to replace the old ones. Fluffy white towels are always superior to any other color of towel, and fluffy is always better than... non-fluffy.

For the hallway, at the top of the stairs, some sort of cool light fixture. Perhaps something like this one?

And finally, for the front porch, a gliding loveseat that will allow the occupants to do lots of snuggling while people watching during long summer evenings.


So there you have it. This castle's Christmas top ten wish list, something for every room in the house. (Almost) Oh, and if you would like to purchase any of these items for your own castle, just click on each image and it will take you to the site. Merry Christmas!

Tuesday, December 8, 2009

Inspiration Tuesday: Classic Christmas Style

I love, love, LOVE! this room all decorated for Christmas. It is cozy and classic, and has just the right amount of decorations to set the mood without being overwhelming. My favorite elements in this room are:
  • That lovely wingback chair
  • The stocking full of greenery on the window
  • The bowl full of ornaments on that beautiful coffee table.
More and more I find myself opting out of the kaleidoscope of color that comes with Christmas and going for much more classic and elegant themes. This year I've done mostly gold and red, with lots of sparkly glass and candles. So pretty, and so elegant.

What is your favorite holiday inspiration photo?

Monday, December 7, 2009

DIY Monogram Coasters from Tiles

It's Week 4 of the Dare to DIY party over at Newlywoodwards. This week our challenge was to create a homemade gift.


We usually try to give handmade gifts whenever we have ideas for making something ourselves. All of Lover's siblings are grown and married, and my brothers are quickly reaching the point where they're able to simply buy whatever they want for themselves. It makes Christmas shopping a little difficult, so we try to give handmade things that will at least have some sentimental value. Of course, we make sure that they're something useful, so we're not cluttering up their home with junk like I mentioned in this post.

Last Christmas I bookmarked this idea of DIY coasters from tiles. The original idea I found actually decoupaged photos to tiles for displaying them in your home. I've also seen many variations of using the tiles as coasters, and I decided to do my own take.


I liked the idea of painting a simple monogram onto the tile and then adding some felt feet to make them coasters.


I found boxes of 4"x4" travertine tiles at Lowe's. They're a really light neutral tan color, which I thought would be pretty in everybody's home. The boxes were about $5 for 9 tiles, so the projects was shaping up to be very inexpensive.


I wiped each tile off with a damp cloth to remove the tile dust. Then I printed out the first letter of the siblings names onto computer paper, and cut out each letter. I traced around the letter onto the tile, using the paper as a sort of reverse stencil.

If you have really steady hands you could handpaint the letter in. I don't, and I wanted to keep things simple, so I used a paint pen in a deep brown to color in the letters. I've always enjoyed coloring, so this part was really fun. :-)

When the paint was completely dry, I took all the tiles down to the basement. I flipped them all onto their backs and sprayed them with a light coat of acrylic sealer (also from Lowes) I let that dry for about half an hour, then flipped them back over and sprayed the fronts. The sealer makes the tile waterproof, protects the painted monogram, and keeps the tile from getting its dust all over everything.

I let them air out down in the basement for about two days, until they didn't stink like sealer anymore. :0) The last step was to take miniature felt circles and stick one to each corner. This protects each tile from the other, and also your fab table!


Pretty packaging is just as important as the gift itself. I tied each set of four coasters together with a pretty ribbon, and placed each set into tins that I found that were the perfect size. The total cost of the project was about$15 for four sets of coasters and about two hours total. Not bad!


Be sure to check out all the other fabulous projects this week at Kim's!

Linked to DIY Day @ A Soft Place to Land