Showing posts with label kitchen. Show all posts

Tuesday, April 29, 2014

Spiffing up the Kitchen

Someday, we will totally renovate the kitchen. I think :) But that day is off in the very distant future, so in the meantime we've done some very affordable changes to improve the look and feel of the kitchen. I mean, we use this room many, many times a day, and its a hardworking part of our house. So it's worth the money to make the room a little more aesthetically pleasing, fresh and comfortable in the meantime.

I tend to want to wait to share rooms until they are 100% done. Which means that I dont really share them, because I struggle with saying that a room is done. Even once we've fixed things up, painted, brought in furniture, etc, there are always things that I want to tweak, fix up, improve, etc. One of my favorite blogs is the The Nesting Place, and her mantra of "It Doesn't Have to Be Perfect to Be Beautiful" has really been speaking to me lately. So in the spirit of un-perfection, here's what our kitchen looks like today. :)


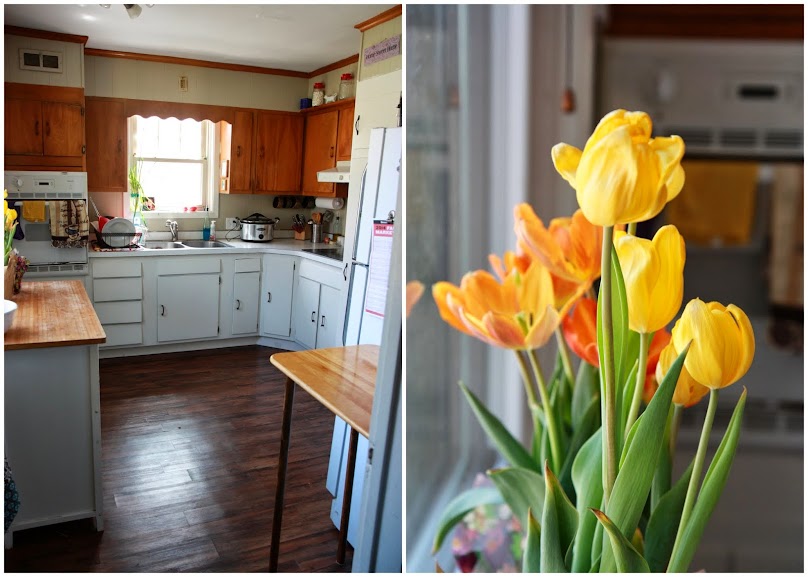
Just kidding. That's what it looked like when we bought the house. It's so...woodsy, right? I've been slowly painting the cabinets, starting with all of the lower cabinets. My goal is to just get them painted, so I haven't worried about using super duper durable paints. I've just used what I have on hand - Kilz Primer and some white semi gloss paint. They look a million times better, in my personal opinion.


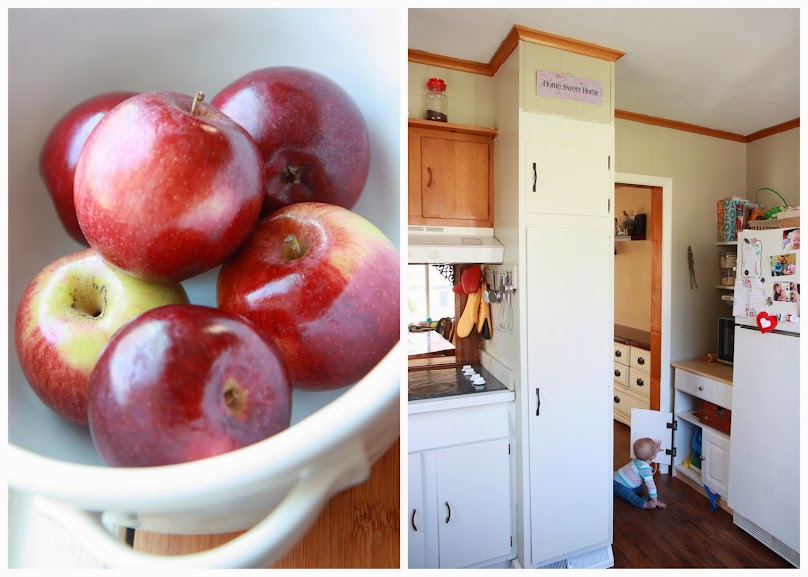
A few weekends ago, we replaced the cracked, peeling and very, very stained linoleum floor in here. We found stick on vinyl tiles that were made in long strips to look a bit like hardwood floors. We banged out removing the old floor, cleaning and patching the linoleum underneath and laying the new floor in a weekend. I was so proud of us. Now we're working on new baseboards, which, although only primed so far, are a significant improvement over the industrial vinyl "baseboards" that were there before.


Stick-on tiles aren't the most durable long term solution, but I love how much they improved this room in the short term. And I love that Keilana (and Javi) can crawl around on a nice, clean, pretty floor. Hello beautiful!


I've painted all the trim in here, and its made a big difference. We also had that big window replaced last summer, which is some of the best money we've ever spent. Having a window that does not leak and opens completely, with a screen? Now that's luxury living. :)

So obviously, next up is painting the upper cabinets. I'm excited to get that done, as it seems like each time that something gets painted, this room gets brighter and nicer. Still, even with only half the cabinets painted, I'm loving how much better everything looks.


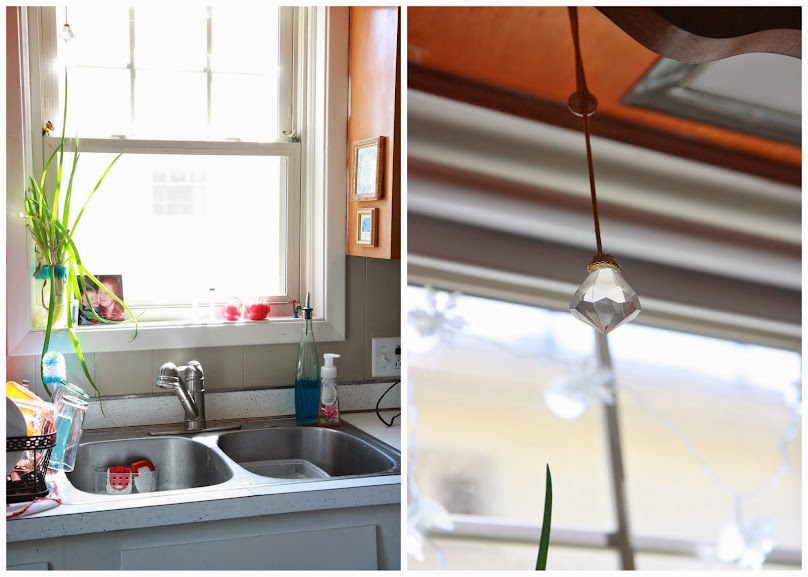
We replaced the faucet last summer. It is the height of luxury: it's high enough to fit big pots under, pulls out to fill up things on the counter or rinse out the sink, and has a sprayer which I just discovered works wonders for cleaning chunks of food off of little baby bibs. I love it. And yes, those are snowflake Christmas lights still hanging in the window. ;)


There isn't a ton of counter space on this side of the kitchen, which is why I love the glass cooktop. It allows us just a little bit more space for cutting and prepping and chopping. Plus, it is hands down one of my favorite things to clean. I know, I'm weird. :)

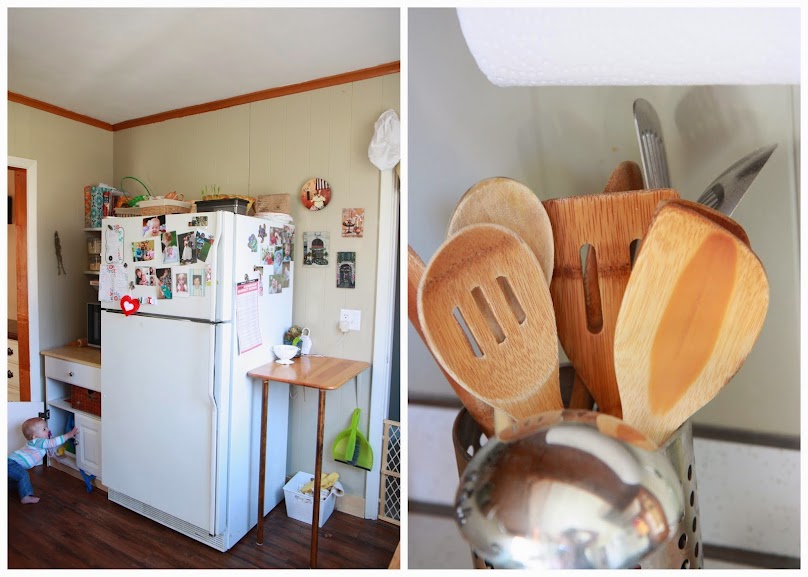
This corner is quite cluttered right now. It's a hardworking part of the kitchen (although just about every corner is in this little kitchen) but it's also up out of reach of the kids, so those shelves and the top of the fridge get loaded with things that need to stay out of the reach of little fingers.


Most of our dry goods hang out on these shelves, along with the radio, some miscellaneous stuff, cook books, the sugary treats basket and a box of cereal that doesn't fit in the cabinet. Randomness. :) I'll address that all at some point. I think someday we are going to fill this wall with builtin shelves to maximize the storage on this side.


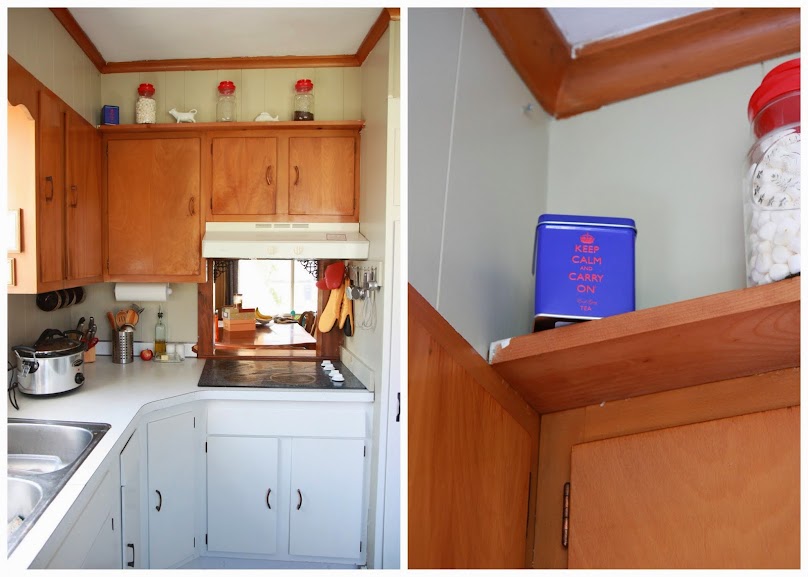
That crown molding is going to be a pain to paint. I actually asked Lover if it made sense to take it all down, and put up prepainted new crown. He assured me that it didn't. :) Someday we want to take out that tall cabinet, and the chimney that runs behind it, and widen that doorway to almost twice the size. That will hopefully help with the bottleneck that a 24inch doorway into the kitchen always creates.


So that's where we are with the kitchen. A new window and faucet, some clean, uncracked floors, and a lot of white paint. It's a significant improvement, wouldn't you agree?


jenny

Monday, March 11, 2013

Happy, happy

Happy Monday! Do you like Mondays? I like them just fine, with the exception of missing Lover. We're always so sad when Monday morning rolls around and  he has to leave for work. :(

I'm on a mission to happy-ify our kitchen. I spend tons of time in there, so it makes sense to fill it with things that make me happy, right?


The first thing I did was make a happy pennant banner. I raided my scrapbook paper stash, and pulled out anything that  worked with my color scheme. Half and hour later I was up on a chair with a drill, hanging my happy banner.


In this shot  you can also  see that I painted the window trim. All the window and door trim has been painted white, and I am working up the motivation to paint the cabinets and crown molding now! Oh, and there's a sneek peak at our new faucet that I LOVE.


A pretty plant in my window makes me smile. Plus, I can't kill it, so double smile. :)Three of the four plants in there are fake. :) Take that black thumb!


I love these dishtowels so much. I have three or four of them, and I wish I had purchased a dozen. :) They're pretty, absorbent and not scratchy. It's hard to find the perfect dishtowel, wouldn't you agree?


I painted a Katie Daisy inspired painting with one of my favorite quotes by Mother Teresa. For now it's hanging to the left of the big picture window, but that could always change. :)


And lastly, a little plaque with an awesome picture of little man and I, with a verse that has a story to it. I'll share it another day.

So those are the most recent updates. All little things that make me smile, and make me love this room a little more. Now, to paint those cabinets!! :) Happy Monday!


Thursday, February 16, 2012

Kitchen Window Shade Swap

Today is February 16th, 2012. Other than my post introducing our little Javi, my last blog was September 26, 2011! And to say that posting was sporadic before then would be stretching the truth a bit. The reality is that from the minute I got pregnant I was exhausted, and that mind-numbing exhaustion never let up until I was about 36 weeks along. And even then, I think it was more out of sheer desperation - the baby's room still wasn't even close to done and it simply HAD to be done. :-)  And now that the little man has arrived, there are more pressing things to be done... like a shower. And maybe food. :-) And sleep if I am lucky.

Anyways, all that to say, I actually did accomplish some projects last year that have been on my list for forever, so I'll be slowly sharing them as I find the time. And I will try to not fill up every post talking about my little guy and how fast he is growing and how awesome it is when he smiles. I really will try. :-)

OK, on to the point of this post. Remember our kitchen?


How it used to look like the inside of a tree, and then I painted the paneling and it looked significantly better? Well, I have been making some more simple updates to this room, while not spending  a ton of money. The plan is to completely redo this room in the next couple of years, so my goal is just to make the room more liveable and maybe a little prettier in the meantime.

We inherited this beautiful window shade with the house. It was perfectly faded and cracked tan plastic. Definitely vintage. And Gorgeous. :) Or not.


I hated it from the get-go, but this window is six feet wide, and six foot wide window treatments are not cheap. Here's where Ollie's enters the scene and makes my day. While browsing there one day as I do periodically, I found an entire rack of oversized window shades. Like dis.


Lovely roman shades that normally would run about 100 buckaroos. Ollie's price? $20! Sold. So I shoved that baby in the back of my two door grand am - if I remember correctly I had to roll down a window to get it home but I was determined. Then I installed that six foot shade all by myself. Girl power!

It actually wasn't that difficult. I put the brackets up first, obviously, and then did a bit of a balancing act to attach the shade. And I loved the difference.


I installed this shade as high as I could above the window to make it look even bigger, and also, I am not going to lie, to cover up some more of that honey colored trim. :) Oh, and an unexpected bonus? The new shade blocks a lot more light  than the old one. Which was awesome during the blistering summer we had. Oh wait, maybe it wasn't that hot... I was pregnant and hot all.the.time. But still, it was nice. Here's a side by side comparison.


Yep. Definitely better. Better looking and better working. :) Now to do something about that trim...

Sunday, November 1, 2009

Kitchen Valance


My kitchen needed some dressing up, so I decided to get creative and add a pretty little valance. Unfortunately, there aren't any valances that are my style, so I had to make my own! Ultimately I end up liking what I make myself better anyways, so I'm glad that the big box stores didn't have the perfect piece of fabric.
I used a dish towel, some binding tape and a spring rod to add a touch of soft fabric to my kitchen.

Here is the before,


and the lovely little after!


My computer is acting up tonight, but come back tomorrow to see how I converted this little dish towel into a pretty little valance! :-)

Tuesday, October 6, 2009

Beautiful White Kitchen


I was looking through my inspiration files this morning, and this space grabbed me again, like it did the first time I saw it. Maybe it's because I am in the middle of a cleaning frenzy, but the simple fresh palette and cool colors of this kitchen are really speaking to me. Normally I like spaces that are a bit warmer, but this kitchen just sums up "sparkly clean" for me today.

Anyone know where I found this stunner of a kitchen?

Sunday, August 9, 2009

Exhibit A: Vinegar + Baking Soda conquer stains

Remember how I told you a while back about my best friends vinegar and baking soda? I'm back to show you literal proof of how these two BFF's work like a charm.

The backstory:
I recently blogged about making strawberry freezer jam and gave you detailed instructions, should you wish to make your own. What I neglected to mention was how I left the strawberry containers on my white countertops for a couple of days before I had time to make the jam. The berries in the bottom were apparently running over with juiciness, and shared the love with my countertop. Hello bright red stain!


I, however, did not panic, as my dynamic duo had come to my rescue many times before. I simply sprayed the stained area with a solution of half vinegar/half water, and then sprinkled a generous amount of baking soda over the stained area. I let it sit for a few minutes, then wiped it off with a sponge. Normally that would kick anything, but apparently this was a stubborn stain. It couldn't resist after a second application though, and here is what my countertop looks like now. Restored to it's former beauty cleanliness!

So the next time a stain appears, never fear, just have at it with some vinegar and baking soda!

Wednesday, July 22, 2009

Ball's Strawberry Freezer Jam


Have you ever wondered how to make freezer jam? Well, you won't have to anymore because I have come to your rescue! Starwberries are dirt cheap right now, so I thought I would take advantage of the sales and whip up a batch of freezer jam. And you get to benefit from my newfound knowledge!

Here's what you will need:

- Four pounds of strawberries, rinsed

- One package of Ball's Freezer Jam No Cook Pectin

- Sugar

- 4 cup glass bowl

- Large bowl

- Sharp Knife

-Strawberry Huller

- Mixing Spoon

-Potato masher

-4-5 Freezer jars

- 1/2 cup measuring cup

-Timer

-Ladle


First things first, wash out all your jars and set them out to dry


Hull and slice your strawberries into small, bite size pieces You don't need to have blurry vision for this :-) Put them in your four cup measuring bowl.


Once all your strawberries are cut up, use the potato masher to smush the strawberries into a nice consistency. The key here is personal taste. If you like your jelly with chunks, don't mush too much. I smushed mine until there were no large pieces left.


Add one and a half cups of sugar to the large bowl. Try not to be disgusted by the amount of sugar that this recipe calls for. :-)


Add the pectin to the sugar, then stir it all together.


Add the berries to the sugary pectin, being careful not to splash red berry juice on yourself.


Set timer for three minutes, stir berries, sugar and pectin together until timer goes off.


Carefully ladle the berry mixture into your clean jars up to the fill line, or fill to about 1/3 inch from the top of the jar. Once again, be careful of splashage.


Screw lids on securely, then label jars with contents and date. I used regular old masking tape, but you can get fancy, if you feel so inclined.


Set your timer for 30 mintues, and go relax and read a magazine or something. You've earned it!


When the timer goes off, put the jars in the freezer.


Voila! You have just made strawberry freezer jam!

Instructions courtesy of Ball No Cook Freezer Jam Fruit Pectin, with embellishment by me.