Showing posts with label before and after. Show all posts

Wednesday, May 14, 2014

A Facelift (no not for me)

You know what's really encouraging? To dig back through the pictures of our house circa 2009. It's so easy to focus on all of the current projects and future plans for this little castle, and forget just how far it has come in just a few short years. A perfect example of what I am saying is our garage. Our property is long and narrow, with a little two car garage situated at the back right corner of the property. Our driveway is about 200 feet long from the curb to the garage doors.

Because of this fact, and the fact that we live in the Land of Snow, we don't use the garage to park our cars. We tried that the first winter we lived here. After hours (literally!) of shoveling we realized the error of our ways and from that day forward we have always parked up by the house. The garage houses all of our outdoor stuff in the right bay, and there is a workshop in the left bay.  When we purchased the house, the garage was in pretty sad condition. Peeling paint, untreated paneling, missing windows. Yuck.


In this picture, in which you can also see my dad and youngest brother hard at work tearing out yet another strange garden bed, you can see that apparently  we parked the car in there at least once. If I remember correctly, my Intrepid fit in that garage by the skin of its chinny chin chin, and we abandoned the idea shortly thereafter.

Also! You can see the old front door propped up against the fence. So glad we replaced that door asap. That was a great project too.


So the first project was safety, i.e. replacing the broken window panes. The broken windows sure did come in handy if you forgot the garage door opener though. For the longest time (six months? a year?) we kept a stick leaning up against the garage and used that to reach in through the broken window to hit the garage door button. Truly. We were those rednecks.


I love that the garage has these big windows. It adds some interest to the big old panels. No, it may not be the safest, but I'll take less safety over ugly blank doors any day. So, the window panes were replaced.


Now to do something about those ugly paint colors. What was it with these people and that horrid shade of orange, anyway? Prepare yourself for the power of paint. Ready?  Ta da! We went with the same trim color as on the house, and the same bright, happy yellow that graces the back deck and entryway on the house. I love it. Also, not pictured, we replaced the lower right hand side of the left bay with new paneling, since it was rotting away into nothingness. Some of the trim is still in pretty rough shape, but it's looking so much better now with a few coats of paint.


Also, please pardon the pile of garden junk in these pictures. I guess I was too lazy to sweep that up? I think I was pregnant when I took these pictures last summer. Yeah, I'm sure that's what it was. :) Anyways, the view from my kitchen window has improved substantially, thanks to a couple gallons of paint, two window panes and some new rot-free paneling. So.Much.Better.


But, lest you think that we are super people who have finished every possible project in this house, here's the side of the garage that faces the neighbors.


That's gonna need a lot more paint. :)

jenny

Tuesday, April 24, 2012

The Nursery: Before and After

 So for this post I am just going to show you the before and after pictures, and then next time I'll talk about where everything came from. Enjoy the drastic difference! :-) 


Before:


After:


Before:


After:


Before:


After:


Before:


After:


Before:


After:


I love the final result. It makes me smile every time I am in the room - which is a lot of time between changing diapers, nursing and rocking little man to sleep! :-)

Thursday, April 19, 2012

The Office (or Beer Room) that Became a Nursery

Wendhurst Castle has a main floor, a second story, a finished attic and a someday, hopefully, finished basement. We’ve worked hard on the second story to make it a comfortable place to spend our sleeping hours.
We’ve made over the master bedroom, a peachy pink, woodsy, metal window blinded room into a comfortable and cozy room for our daily (nightly?) use. You can read more about that process here.


We took the bunkbed filled, wallpapered, grass green carpeted second bedroom and turned it into a light and bright guest room with lots of contrast and class. Go here to see more before and afters.


We’ve even transformed the landing from this depressingly dark area to a fun and bright space.


Someday, we’ll also renovate the bathroom, but at least it’s not a dark brick filled fluorescent cave anymore.


So all that remained on the second floor in need of our attention was the “office/beer room/future office/eventually became the nursery” room. It’s a tiny room that was in okay shape structurally and had a lot of really functional built-ins, but like every other part of Wendhurst Castle, cosmetically it was a wreck. The only thing this room had going for it when we bought it was some nice Berber carpet, but we tore that out along with all the carpet in the first few weeks because living with someone else’s pet stained carpet is gross. :)  Oh and btw, the hardwood floors underneath were the most paint speckled, abused and ruined floors in the house. Except for maybe the guest room. Or the dining room. :-) 
Here’s what it looked like on our first walk through. Immediately on your left was the little closet.


It, like all of the walls not clad in cork or paneling, was painted a lovely shade of highlighter blue. A neon, bright, hurts-my-eyes to look at it shade of blue.


The back wall sported one window, a paneling clad wall, and above the paneling, where the ceiling slants a bit, a lovely stretch of cork. (Exactly like the cork in the living room)


The south wall was clad in more paneling, a funky builtin shelf, and the second window. I need to mention here that both windows are “custom made” windows that desperately need to be replaced. When we had a window guy out to quote us on new windows, he politely said “I’ve have never seen such… interesting, custom windows.” The back window does not open unless you unscrew the entire frame and literally pull it out of the wall. It’s genius I tell ya.


The west wall is entirely taken up by a builtin desk and cupboard. They are very functional, but again, more paneling, and more cork. And last up, the crème de la crème.


The wall mounted builtin beer fridge. Yep, you read that right. One of those small beer fridges was screwed into the wall with a lovely little builtin table below it. For setting your beer on, of course.
Funny story, after removing this fridge from the wall, we used it for a little bit and then decided to sell it. I put it on Craigslist for $40, and a guy emailed me about it within a couple of hours. He came with his family to pick it up, and told me he was going to put it in his garage to be, wait for it, his beer fridge! :-) No lie.
Anyways, so that’s where we started in this room. Initially this room was going to be my office/craft room, but renovating it got pushed to the back burner until I got pregnant, and then the need for a craft room was much less urgent  than the need for a safe, comfortable place for a baby. :-) Next up I’ll show you how we fixed up this room and made it into a cute, fun little room for our little man.

Thursday, April 12, 2012

Nightstand Revamp

 When I moved back to the States a friend of the family gifted me with a set of bedroom furniture – a dresser and a nightstand of lovely honey colored wood, very solid and in great shape.


I was so grateful because I needed everything and all of my money was going towards a car. :)  I used that nightstand for all of my single years, at our apartment, and in our master bedroom of this house up until last summer. You can sort of see it in this picture. 


Last summer I found a set of matching nightstands on Craigslist for a steal, so I scooped them up for the master bedroom. Which meant that I now had an extra nightstand without a home.
At the same time, I was trolling Craigslist for a skinny little nightstand for the guest room. I had the white curvy one in there already, but whoever slept on the opposite side of the bed was both lamp and nightstand-less. So I was on a mission to find a little table for that spot.
You see where this is going, don’t you? :) Yep, I put on my thinking cap and realized that I had the perfect piece sitting in the attic. So I hauled it down to the porch and got started making it over to work in the guest room.


I had a free quart of satin black paint that I used to paint the whole nightstand. Then I used a gallon of white paint we also already had to paint the drawer. It took me an hour or so on a summery afternoon, and I left both pieces outside to dry in the sun.


Then the wind started up and literally threw my drawer and nightstand twenty feet across the porch! So I repainted. :) And let them cure again, this time on a non windy day.


Hobby Lobby has a great selection of interesting knobs, much like Anthropologie but without the ridiculous price tag. I took a drive out there to select the perfect knob for my freshly painted table, and came home with a fun geometric looking one. In black and white of course!


So here is the finished product. Normally it sits nice and straight in the corner, but our bed is currently out on loan so you got the nice and pretty angled shot. :)


I let the paint cure for a million years before setting that lamp on it, so hopefully it will keep its nice painted finish for a long time. I also want to point out what a nice black this paint was. It's really rich and beautiful.  


And while we are talking about this little corner, I found the lamp at Goodwill, put a fresh white shade on it, and also hung up some black and white postcards I bought years ago in Paris. They were just the right touch for this room.


I’ve also gone back and forth for some time now on painting those reddish brown floors white - this IS the black and white guest room after all! And the floors in here are in really bad shape. But that’s a project for another day. Today’s project was the nightstand, and it’s all done! Yay me! :)


Friday, March 30, 2012

Lined Bottoms and Other Chair Tales

 I’m slowly starting to figure out how to work on some crafty projects again. It requires a bit of juggling around nursing sessions, diapers and naptimes, but the reward is huge. When I complete a project (or even cook dinner for that matter!)I feel like I am starting to figure this whole mom-life thing out. So I spend a lot of nursing sessions figuring out how to break projects down into fifteen minute blocks because that’s the length of time Javi can play on his own right now.


The lining on this blue chair has been ripped out since the day we moved in. (the previous owners left it here, and then I serendipitously found its match at a garage sale almost two years later!) When I say ripped out, I mean only tiny amounts left, and those were in shreds.


Considering the velvet was covered in cat hair, I can deduce without much detective work that this chair was a favorite hangout for a former feline resident.
The last little shreds hung down on the sides of the chair as you can see below, and it drove me batty. But obviously not batty enough to do anything about it for about for four years. :-) 


In my purging, cleaning and organizing, I found a length of black fabric left over from making the bed skirt in the guest room. It was the perfect weight to use as a new chair bottom lining. Lined bottoms are always better, wouldn’t you agree? :-)


Fifteen minutes later, after a date with scissors and a staple gun, the chair’s innards were neatly covered up by the lining once again, and I was a happy camper. Lined bottom, project completed, and the baby was still happily swinging away. It was a good day!


Wednesday, June 15, 2011

The Life and Times of a Frenchy Dresser

Boy do I have a treat for you today. :-) The long awaited reveal of the frenchy dresser that I affectionately dubbed "Franchute" (Fran - choo - tay). Meet Franchute.


Ok, first up, you need to hear how I acquired said dresser. Last year I was trolling Craigslist for a new coffee table. I knew I wanted something fancy looking, sturdy and substantial. I found a few potentials, including this one and emailed them all. I never heard back about this little frenchy dresser. Or so I thought. Over a week later, I got a call - are you still interested in this dresser? Am I interested? You betcha. So Lover drove me forty minutes out of town to get this little dresser that I had my heart set on. We hauled it home and I set it up in the place of the table that Lover made, and I loved it. And then we started using it. And this happened.


Rings! Spots! Water marks! EVERY single time we dropped a single drop of water on this table, it would leave a mark. Needless to say, it drove me bonkers in two seconds flat. Add to this problem the fact that I felt the table was a smidge too high, and bulky looking in the center of the room, and it wasn't long before the idea of making this our new coffee table was scrapped. Plus, call me sentimental, but I missed the table that Lover made me in our first year of marriage.


About the same time, we were finishing up the loveseat, and had gotten rid of the old behemoth one that took up half of the right side of the living room. And then fate smiled on me and I found a perfect match to the blue chair we already had, and I knew that I wanted to replace this


with the blue chairs and Franchute, once he had a makeover. So I hauled that guy down to the basement and started in.

The top was stained, and the bottom and drawers were painted. My plan was to simply refinish the top in a very deep dark stain, and then choose a fun color to repaint the bottom and drawers. So I started sanding.

And lo and behold, the wood that was under that horrible stain job was freaking AMAZING! It is seriously some of the most beautiful grain I've ever seen. :-)

I saw no reason to cover that up, so I did one quick coat of Dark Walnut from Minwax and let it dry.

See that awesome grain? My goodness. So pretty. Then I applied four coats of Wipe On Poly in a Satin finish. This is the same finish I used on our coffee table, and it has held up perfectly for almost five years with daily abuse (read no coasters, crayon drawings, etc) I finished this in January, and we've been using the dresser since then, and it looks perfect.

So then I had to decide on a paint color. I thought about blue or a light coffee color, but decide to break out of my safe zone and paint it a deep purplish red. I hemmed and hawed about two different color choices - Perfect Plum and Royal Garnet by Valspar for quite a while. I even put it on Facebook for a poll. Royal Garnet won overwhelmingly, which was great, because that was the one I wanted anyways. (Hey, it had a cooler name! :-) And I painted the base the next day. This is the pic you saw in February.

I ended up doing three coats on the base, and then wiping a quick coat of stain (again, the dark walnut) over the top. It deepened the color a bit, brought out all the details, and helped the paint relate to the stained top. Then I started on the drawers. Kill me now. My plan was to strip the paint out of the middle insets, stain them and then paint around them. This process took me four more months. :-)

After much work, sweat, and tears, here's how they ended up.

Lovely. But it took a while. The paint on those drawers was STUBBORN and I actually had to repeat the whole process twice. The first time the drawers looked disastrous. Now they look lovely. :-) I also stripped the paint off the little gold handles by boiling them in a pot of hot water with baking soda. Worked like a charm. Yay!

Ready to see the whole ensemble? Here's the before again to remind you:

And the lovely afters:

I love it. It has drama and va-va-voom. :-) It's incredibly functional, but still so pretty and sassy. And isn't that bowlful of peonies on top just to die for? All my peony plants bloomed this year, and they are gorgeous.


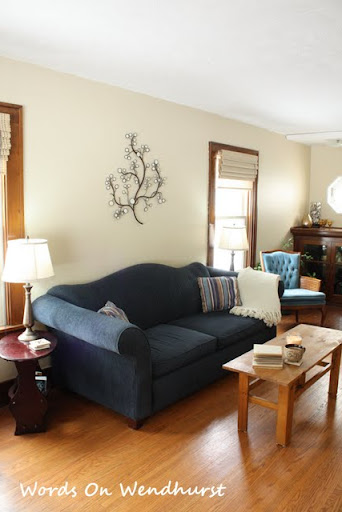
The ruffles! The tiny pink petals! The drama! :-) Ok, I am done. Oh, and isn't it freaky how well the new blue chair matches the one that came with the house? :-) I love when that happens. And when chairs are five dollars at garage sales. :-)

I am currently making some new art to go above the chairs and dresser, and it's coming out great. :-) I'll show you as soon as it's done. Or four months after. Whatever. :-) Have a great day!