Part one of our curbside renovation is complete! If you recall, the plan is multifaceted and includes, but is not limited to, the following:
- Have the stucco professionally powerwashed to get rid of muck, dirt and mold. Eww!
- Paint the door, windowsills and gables in a soft forest-y green to coordinate with the yellow stucco. (No more orange, hurrah!) Paint the front porch floor too.
- Replace the porch light fixture
- Replace the old, broken down, mostly dead evergreen bushes.
- Repair the concrete stairs.
- Add some nice landscaping to the front.
Part one was replacing the bushes with fresh pretty ones.
Here's the before:
And the after:
Updating the bushes meant tearing out the mostly dead evergreen bushes, which my very strong lover accomplished in about an hour. Seriously people, this would have taken me a few days if I had tried to tackle this part of the project. He attacked those bushes with vigor, and one hour later there were no bushes to be seen, and the only casualty was an old shovel. :-)
Next up was some fresh dirt mixed in with the old stuff, to give the new bushes a head start. We have a planter in the backyard that we're working on removing, so we simply transplanted the dirt from back to front.
Then we laid out our new bushes to ensure proper placement. Five in the back, two in the front, clematis by the trees, and some daylilies for color and interest.
You may be wondering how we decided on these particular bushes, and where we purchased them.
We actually ordered the boxwoods off of ebay. This was my first time sending away for plants, so needless to say I was a little worried about the results. But, this reno was on a strict budget, and there was no way we could afford $30 a bush when we had to purchase 7 bushes. Do the math people, that's like a lot of money. :-) For bushes. Enter Ebay.
I scored 10 Wintergem Boxwood plants for $20.00 plus shipping. A week later, a box was on my porch with not ten but 12! plants inside, all carefully packed and healthy and green looking. :-) We selected the five biggest and healthiest to put in the front. The extras will replace some other scraggly bushes we have around the yard. And, they were all cheaper than one big plant from a garden center! Now, obviously, they are much smaller, but I specifically chose these bushes for their fast growth rate so it shouldn't be a problem.
I also ordered the Elegantissima Boxwoods from Ebay. These were a little more expensive at $5 each, but we only needed two, and they were still $30 a piece everywhere else.
Both the Wintergem and the Elegantissima keep their happy green color year round, with lighter green leaves showing up in the spring. The Wintergem will grow to be about 3 ft high and across, while the Elegantissima will be a little smaller. We placed the Eleg. slightly in front of the Wintergem as they have pretty little ivory and light green leaves and are slightly more interesting than the Wintergem.
Next up were the daylilies. These guys are just a fun flower that are great for filling in bare spots and adding color and interest. We planted two directly in the ground, and two in large metallic looking pots on the sides. We purchased all four plants from Lowes and we are hoping that we won't need the 1 year guarantee!
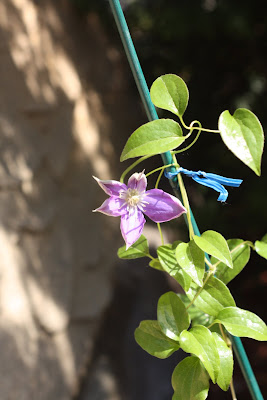
Bringing up the tail end of this planting frenzy are the clematis. We planted a clematis by each tall tree on the sides, and gave it a bamboo pole and some wire to climb. The plan in for these little vines to grow up into the trees, where their flowers will add some spice to those old evergreens' lives. The flowers are a pale purple, and they look really nice so far.
In other news, my hanging baskets of petunias are doing wonderful. They have the most heavenly scent, and tons of blooms so far. I hope they keep spreading out so they're even more dramatic.


No comments:
Post a Comment