Showing posts with label cooking. Show all posts

Monday, April 14, 2014

This cake is the bomb {Tiramisu Layer Cake}

Do people still say "the bomb" anymore? Probably not. Oh well, I've never been trendy, and it's too late to start now! :) Perhaps this week, as you plan out what you will do for Easter, you are thinking about what to serve for dessert. And if you are, let me humbly suggest this masterpiece of a cake.  I found it on allrecipes.com, where I've found most of my favorite recipes by searching through their five star ratings.

I first made this delight a few years ago for Mother's Day, when tasked to bring "an amazing dessert". This cake delivered. My mother-in-law talked about it for months afterwards!

This cake has all of the elements to be a blockbuster success: mascarpone cheese, coffee, Kahlua, heavy cream, more Kahlua... so very, very good. :)


I'm not a food blogger, so I didn't do that cool step-by-step picture thing. I've tried that before, but I always forget after step 6 or 7, throw it all together, and then barely remember to take a photo of the final product. So. Here's the recipe.

Ingredients: (don't be scared by the long list. A lot of the items are repeated. Also? This is one of the recipes where you shouldn't skimp or substitute. Go with the good stuff.)

CAKE:
1 (18.25 ounce) package moist white cake
1 tsp. instant coffee powder
1/4 c. brewed coffee (I use French vanilla coffee for this and it's divine.)
1 Tbsp. Kahlua

FILLING:
1 (8oz) container of mascarpone cheese
1/2 c. confectioner's sugar
2 Tbsp. Kahlua

FROSTING:
2 c. heavy cream
1/4 c. confectioner's sugar
2 Tbsp. Kahlua

GARNISH:
2 Tbsp. unsweetened cocoa powder
1 (1 oz)square of semi sweetened chocolate.

Directions:

  1. Preheat your oven to 350 degrees. Grease and flour three 9 inch cake pans.

  2. Prepare your cake mix according to the directions. Divide 2/3 of the batter between 2 pans, and then stir the instant coffee into the remaining batter. Pour into last pan.

  3. Bake in oven for about 20-25 minutes. Let cool in pan for 10 minutes, then remove from pan and cool on a wire rack until completely cool. Combine your brewed coffee and 1 Tbsp of the Kahlua, set aside.

  4. For the filling: In a small bowl, with mixer on low, combine mascarpone, 1/2 c. confec. sugar and 2 Tbsp. of Kahlua; beat just until it gets smooth. Cover with plastic wrap and refrigerate.

  5. For the Frosting: In a medium bowl, beat cream, 1/4 c. of confec. sugar and 2 Tbsp of Kahlua with mixer on med-high until stiff. This will take about 10 minutes. Fold 1/2 cup of this cream mixture into the filling.

  6. To assemble: Place one plain layer cake on a plate. Poke holes in cake with a skewer, about an inch apart. Pour one third of the reserved coffee mixture over cake, then spread with half the filling mixture. Top with coffee flavored cake, repeat holes and pour another third of the coffee mixture over this layer. Spread with remaining filling. Top with remaining cake layer, poke holes, pour rest of coffee mixture over the top. Spread top and sides of cake with frosting. Place cocoa in a sieve and lightly dust the top of the cake. Shave chocolate square into curls and garnish top of cake. Refrigerate for at least 30 minutes before serving.


I know it seems like a lot of work. It will take a while, but if you make the filling and the frosting while the cakes are baking, it really cuts down on the length of time. And because you can't taste something through a computer screen, you'll just have to trust me that it's that good. Worth the time and the extra ingredients. I am now considering making this on Saturday for our family brunch. :)

jenny


Wednesday, March 19, 2014

10 Kitchen Gadgets I Can't Live Without

10kitchenitemsicantlivewithout


I’m not a big gadget person in the kitchen, unlike some people I know. *cough Lover cough* That said, I thought you might like to know what gadgets I do use, all of the time. And because I’m a firstborn, and therefore bossy, I’m telling you that you need these ten things in your kitchen, pronto. :) Pull out your wallets.

1. Hot Pot

I registered for this brand of hot pot when we got married. We are now on our second one, because I literally used the first one so much it died. What do I use it for, you ask? Welp, I use this hot pot to heat up water every.single.day. No lie. I use it for tea, for oatmeal, for making Jell-O. It heats up a cup’s worth of hot water in less than five minutes. It tucks away in a cabinet very easily, but 9 times out of 10, it’s on my counter because it gets used so much. Also? I’m a bit of a snob about my tea water. I hate heating up water in the microwave because it gets that nasty scum on the top of the water. And I hate the way my mug gets ridiculously hot in the microwave. Besides, while I love a pretty tea kettle, the hot pot heats up water about 1000x faster than a tea kettle. And yes, I measured the time. :) Seriously, you need this little appliance in your life.

2.Clean Edge Can Opener:

(Mine is a Pampered Chef one that I bought years ago)I love not having those raggedy edges on my cans - hello safety! It always takes other people a minute to figure out how to use my can opener, but I really do prefer it to the old kind.  If you get one of these, you’ll probably also want a can strainer since you can’t use the lid because of the way this can opener works. By the way, you should always have a manual can opener in the house in case your power goes out!


3. Silicone Coated Wire Whisk

A coated wire whisk was one of those things that I thought, meh, I don’t really need that. Until I got one and gosh do I love this thing. Why, you ask? The coating means that it doesn’t scratch your pots. Bonus, it also does not make that metal on metal sound that drives me up the wall. And, it cleans up 137 times easier than a regular wire whisk. Mine hangs right next to my stove so that it’s always at arms reach.


4. Kitchen Scissors.

I’m trying to cut down on the amount of duplicate items we have in our house. But one of my must haves is a pair of scissors just for the kitchen. I use them more than you might think is possible. A short list of things I use them for? Snipping herbs into my cooking. Cutting open packaging. Cutting up meat. Cutting up bacon for anything. :D Cutting up food into bite sized pieces for the kiddos.I have a slot on my knife block that they go into so I always know where they are. These ones will cut just about anything, wash up very easily and have not rusted at all.


5. Pyrex Glass Measuring Cups

The fact that these are glass means that you can melt stuff in the microwave (hello butter, I love you!) in them. You can whisk up dressings, marinades and spreads in them. You can steam vegetables in them. II may be stating the obvious here, but they are great for pouring. I have the 1-cup, 2-cup and the 4-cup and I use them all constantly. Oh and because they are glass they still look the way they did the day I bought them.


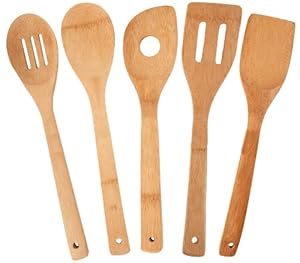
6. Bamboo Cooking Utensils

I use these babies every single time I cook. Soups, sautees, sauces, you name it. They are awesome. You don’t have to worry about scratched pots, and they look great in a crock on the counter. I’ve been meaning to pick up a new set, since mine are starting to look a little worse for the wear, since I use them so much.


7. Garlic Press

(Mine is by Martha Stewart) We cook with a lot of garlic. Like, a lot. Most recipes call for the garlic to be diced, and there’s not much in the world I hate more than trying to dice up that little clove of garlic, and then dealing with the sticky, smelly residue that it leaves on my hands. A garlic press makes everything easier. Also, I just recently learned that you can press the clove without peeling it first. #lifechanger!


8. Pampered Chef Spatula.

Very, very rarely do I tell someone they need to buy a specific brand of something. But these Pampered Chef spatulas are the bomb. I have the mini, my friend Sara has the bigger one, and they are so perfect for serving baked goods I could cry. Too much? OK, they’re just awesome. They don’t bend, they’re not flimsy, they clean up easily - perfection.


9. Oxo Pro Vegetable Peeler

You know how when you peel ten pounds of potatoes a vegetable peeler starts cutting into your palm and becomes a permanent part of your arm? And how the blade works on like 65% of the potato, but then just stops working randomly? And it also does that wonky spinning thing so that the dull side is facing whatever you are peeling, and you are now just wasting your time? Yeah, that doesn’t happen to me anymore. This one is comfortable to hold in your hand, needs minimal effort to peel, and does it right every time. Go buy one today. You’ll thank me.


10. Stainless Steel Measuring Cups

Another gem that I registered for. These all hang next to my stove and get used constantly. I got metal because I didn’t want to worry about them warping or getting dull and scratched looking (I hate when things look old and used), and that was definitely the right call. If I ever needed to replace them, I might switch to these, just because I may or may not have bent the handles on mine a few times. They bend right back, but it’s still a little annoying.


So there you have it, ten of my favorite kitchen items that make my life a whole lot easier. Tell me, what gadgets can you not live without?

jenny

Monday, March 19, 2012

No Bake Nutella Cheesecake


I've been challenging myself to try new recipes lately, and pinterest has been a great help with that challenge. I'm only just starting to learn to like cooking, up until I got pregnant it was always just a chore. Then,  once I got pregnant, smells were just so, well, smelly, that I didn't spend a lot of time in the kitchen. I can count on one hand the number of times I remember cooking while pregnant. Which tells you two things: 1) I didn't cook much and 2) I was in an exhausted daze for many of the 40 long weeks. 


Anyways, I'm back to cooking now, but of course I now have a three month old to juggle cooking and baking around. Which I am actually finding to be super helpful, because it means I need to have a plan at the beginning of my day, and work on a meal throughout the day as I have time. Smaller blocks of time in the kitchen and more planning, along with some new recipes, seem to be a winning combination for me. 


We had friends over for dinner a few weeks ago and I made a nice, simple meal and these Nutella cheesecakes for dessert. And they were yummy enough to tell you about! :-) They were also incredibly simple to whip up - I made them during nap time and still had time to squeeze in a quick nap for myself. Here's the recipe.


INGREDIENTS:
For the Crust
12 Oreo Cookies, crushed into crumbs
3 tablespoons unsalted butter, melted


For the Filling
1 (8 ounce) package cream cheese, softened
2/3 cup Nutella
1 teaspoon pure vanilla extract
1 (8 ounce) tub frozen whipped topping, thawed


For the Garnish
whipped topping, optional
chocolate shavings, optional
toasted, chopped hazelnuts, optional


DIRECTIONS:
1. In a medium bowl, stir together the Oreo cookie crumbs and melted butter. Evenly divide the crumbs between your individual serving dishes and press into the bottoms of the dishes to form a crust layer.


2. In a large bowl, with an electric mixer, beat the cream cheese and Nutella until smooth. Add vanilla and mix to combine. Using a rubber spatula, fold in the whipped topping until well blended and no streaks remain.


3. Evenly pipe or spoon the filling into individual serving dishes. Cover with plastic wrap and refrigerate for at least 2 hours before serving.


4. If desired, garnish with additional whipped topping, chocolate shavings, and/or toasted, chopped hazelnuts.


Makes 4- 6 servings. 


~~~


My thoughts: These are really sweet, but taste less sweet after they've chilled a bit. I divided the batch into 4 servings, and they came out as huge servings. So I would definitely do at least 6 servings, maybe even 8. We also make a lot of mini desserts in shot glasses, and I think these would look darling as minis. All in all, a very yummy dessert!


Original recipe here

Monday, March 12, 2012

S'Mores Cookies

 Are you ready for spring? Are you already thinking about summer? (I am, if only because of our weeks in Tampa, oh 80 degrees - how I miss you!) If so, you may be thinking about campfires and warm nights too, and the very best part of campfires - s'mores! Well here's a way you can have your s'mores and eat them too - even if there is still snow on the ground. (Like there is at my house right now)


S'Mores Cookies! :-) They have graham cracker crumbs in the cookie, and marshmallows and chocolate pieces on top! Yummy! Here's the recipe:


1 1/2 cups all purpose flour
1 cup graham cracker crumbs
1 teaspoon baking soda
1 teaspoon salt
1 dash of cinnamon
1 cup (2 sticks) butter, softened
3/4 cup sugar
3/4 cup brown sugar
1 teaspoon vanilla extract
2 eggs
2 cups miniature chocolate chips
1 1/2 cups mini marshmallows
2 Hershey bars, chopped


Preheat oven to 375 degrees.


In a medium bowl combine the flour, graham cracker crumbs, baking soda, salt, and dash of cinnamon. In a second larger bowl beat together the butter, sugar, brown sugar and vanilla extract until creamy. Add the eggs one at a time, beating well after each addition. Slowly beat in the flour mixture until smooth. Stir in the chocolate chips. Drop by rounded tablespoon onto ungreased cookie sheet.


Bake for 8 minutes, and remove from the oven. Push 3 to 4 marshmallows and a few pieces of hershey bar into each cookies. Return to the oven and bake an additional 3-4 minutes until fully cooked. Cool cookies on a wire rack.


Makes approximately 4 dozen cookies.


~~~


I found the addition of chocolate chips to be excessive. I mean seriously, these things are already suuuper sweet. But if chocolate chips are your thing, by all means add them. Also, my batch made 2 dozen cookies, not 4. Come to think of it, my batches never make as many as the recipe says. Does that mean my portion sizes are off? :-) Surely not. 


Anyways, these were yummy and tasted like cozy comfort food in a cookie. Which I suppose cookies are always comforting, so that is kind of an irrelevant statement. Oh well. Make them and let me know what you think. :-) 


Original recipe found here. 

Friday, March 9, 2012

Pan Seared Salmon with Roasted Asparagus


Lover and I have been trying out some new recipes. I've grown tired of our normal rotation of chicken, beef, more chicken, more beef, the occasional soup, and more chicken. :-) So we've been trying out some fish - slowly and cautiously dipping our toes into the overwhelming world of seafood. Did I mention that Lover has a slight seafood allergy? Yeah, so we are taking it slow and seeing what is ok and what is definitely not A-ok. I thought salmon was a good place to start, as I'd heard it is like the steak of fish - cook it simply, add a few spices and you are good to go. The verdict? Yummy!


We cooked the salmon in a frying pan on medium heat, letting the olive oil heat up till warm before we put the salmon fillets in. They were thick fillets, so we let them cook on each side for about 3-4 minutes. Then, just before we pulled them out of the pan, we spread some "finishing butter" on each fillet and let them cook for another 30 seconds or so. The finishing butter was just some butter mixed up with garlic, salt and onion powder, very simple but oh so yummy. We let the cooked fillets sit for another 3 or 4 minutes before eating them - and I think this made them a lot juicier.


Whilst cooking the salmon, we were also roasting up some fresh asparagus in the oven that we had brushed with some olive oil and spices. We also threw a few rings of fresh pineapple in on a separate pan, and when everything was done we sat down to a table that looked like this:


The salmon was delicious, and the asparagus/pineapple combination was AWESOME. Like, may be my new favorite side dish awesome. Scrum-diddly-umptious kind of awesome. :-) Anyways. Make this meal, I dare you. And enjoy a yummy dish that contains neither chicken nor beef nor soup. :-) 


Friday, June 4, 2010

Friday Fav: World's Greatest Bean Dip

Today I am sharing a recipe that will change your life. It will also change your body, by adding many, many pounds to your hips. :-) This stuff is the best there is, and it is seriously addictive. I always keep the three necessary ingredients around, as this is a quick and simple dip that is a hit at every party.

World's Greatest Bean Dip


Ingredients:
One can of Hormel Chili with Beans
One 8 oz package of cream cheese
1-2cups shredded cheddar cheese
Tortilla Chips

Directions:

Spread entire package of cream cheese over bottom of a glass pie plate.

Cover cream cheese with bean chili.


Cover chili with shredded cheese.

Place in microwave, heat on high for five minutes or until shredded cheese is melted and dip is bubbling.

Remove from microwave and devour with tortilla chips.

You're welcome.

Friday, February 19, 2010

Friday Favs: Magic Jell-O

If you need a quick and easy standby recipe for a dessert, I've got it for you. I've yet to meet anyone who does not rave over this dessert. (Well, except for my picky brother in law, but he doesn't count.) :-) This recipe is simple, takes about 10 minutes to make, and is ready for company that evening.

"Jell-O? I could be Jell-O."


"You're never gonna be Jell-O!"


"I have to be Jell-O! "


(name that movie)


Magic Mousse Jell-O


What you will need:

  • Jell-O package (3 oz size) , any flavor (I think the berry flavors are best with this recipe)

  • 1 1/2 cups boiling water

  • 1 8oz tub of Cool Whip, frozen or thawed.

  • Berries, any kind, frozen or fresh about 1 pint.


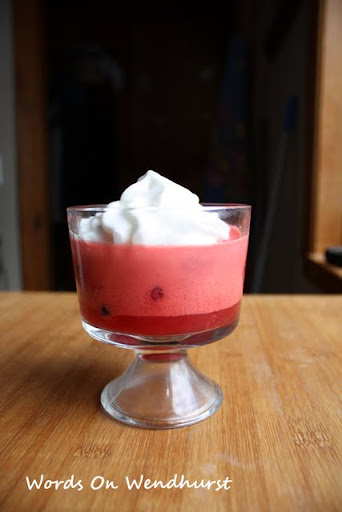
Pour the Jell-O in a bowl. Mix with the boiling water until completely dissolved, about 1-2 minutes. Quickly add the cool whip in large chunks, stirring the mixture with a whisk until completely dissolved.

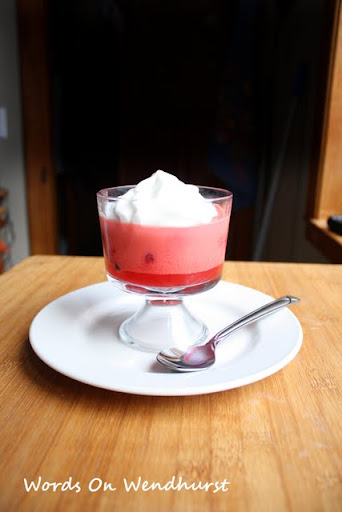
Place a few berries in the bottom of your cups. Pour Jell-O mixture over the berries, and refrigerate for 4 hours. Jell-o will magically layer while it is setting.

When set, top with more Cool Whip and eat up the yummy goodness!

Makes 4 1/2 cup servings. Enjoy!


Recipe created by Jell-O.

Linked to Finer Things Friday @ Amy's Finer Things

Foodie Friday @ Designs By Gollum

Sunday, January 24, 2010

Spinach Stuffed Chicken with Bacon


Lover and I are enjoying a lazy Sunday afternoon, especially because Lover just finished working 32 hours over the course of Friday and Saturday. It's insanity I tell ya! We decided to make up something delicious for dinner, using whatever we had in the fridge. We decided on spinach stuffed-bacon wrapped chicken breasts, and let me tell you, they were ah-mazing! Here they are all ready to go in the oven:


And then on our plates, ready to be devoured.


If you'd like to make your own, here are some guidelines:

Ingredients:


  • 4 green onions, sliced

  • one medium onion, diced

  • one stalk of celery, sliced

  • two cloves of garlic, diced

  • frozen spinach

  • two handfuls of mozzarella

  • small container of ricotta

  • four large chicken breasts

  • 6-7 bacon strips

  • spices (thyme, garlic powder, rotisserie chicken spices, etc)

  • a little salt


We chopped the onions, celery and garlic, (and thyme to taste) and sauteed them all in oil till tender. While that was cooking, we heated up the spinach in another pan with water. Once the spinach was warm ,we added it to the onion mixture, along with the ricotta (about half the container) When the ricotta was heated, we added the handfuls of mozzarella, and then let it all simmer together for about 5 minutes. While it simmered, we trimmed the breasts and cut them open for stuffing. We sprinkled them inside and out with garlic powder and rotisserie chicken spice.

Then we carefully stuffed the breasts, keeping them closed with toothpicks and wrapped the bacon around them. Then we set them in a glass pan we had sprayed with cooking oil, and cooked them for about 15 min, or until they showed a safe temperature.

All that's left to do is enjoy the yummy goodness!

Linked to

Metamorphosis Monday @ Between Naps On The Porch

Made It for Monday @ Cottage Instincts

Make Your Monday @ Twice Remembered

Making the World Cuter Mondays @ Making the World Cuter


DIY Day @ A Soft Place to Land

Foodie Friday @ Designs By Gollum

Monday, November 30, 2009

Dare to DIY: Easy Fudge Recipe


This week for Dare to DIY we are sharing our favorite Christmas cookie recipe. What are my favorite Christmas cookies? Well, they're not cookies at all. They're fudge. I love fudge with a passion, and two years ago I set out to learn how to make it so I could gain 10lbs over the Christmas season enjoy the fruit of my labor. I first tried a recipe that was a lot more complicated, and it used marshmallow fluff, which I am not a fan of. It also required watching the temperature of the fudge and yada yada, other complicated things. Not my cup of tea. So last year I did some research and found this amazing fudge recipe from Carnation that is the simplest recipe you ever did see. It's oh so chocolate-y, light, smooth and creamy.

Carnation Famous Fudge Recipe

Ingredients:
1 1/2 cups granulated sugar
2/3 cup (5 fl.-oz. can) NESTLÉ® CARNATION® Evaporated Milk
2 tablespoons butter or margarine
1/4 teaspoon salt
2 cups miniature marshmallows
1 1/2 cups (9 oz.) NESTLÉ® TOLL HOUSE® Semi-Sweet Chocolate Morsels
1/2 cup chopped pecans or walnuts (optional)
1 teaspoon vanilla extract

Directions:
LINE 8-inch-square baking pan with foil.

COMBINE sugar, evaporated milk, butter and salt in medium, heavy-duty saucepan. Bring to a full rolling boil over medium heat, stirring constantly. Boil, stirring constantly, for 4 to 5 minutes. Remove from heat.

STIR in marshmallows, morsels, nuts and vanilla extract. Stir vigorously for 1 minute or until marshmallows are melted. Pour into prepared baking pan; refrigerate for 2 hours or until firm. Lift from pan; remove foil. Cut into 48 pieces.

The best part about this fudge recipe is that it can easily be modified for different flavors. There are so many great flavored chips out there, You can easily sub in a cup of peanut butter/chocolate swirls, or peppermint, or white chocolate and dark chocolate. Then you can give a variety of fudge flavors with your Christmas cookies! That is, of course, if you haven't eaten it all by then. :-)

Enjoy! Be sure to check out all the other yummy cookie recipes over at Kim's!

Linked to DIY Day @ A Soft Place to Land

Original recipe here

Thursday, October 22, 2009

Ultimate Chocolate Cake


A few weeks ago my soon to be sister-in-law and I got together for some "girl time." She brought this awesome chocolate cake and some chocolate covered strawberries. Let me tell you, this stuff is AWESOME. Our local grocery chain, Wegmans, held a contest a while back to find the ultimate chocolate cake recipe. They came up with a moist, rich chocolate cake with a creamy frosting, that is the ultimate fix for when you really want some decadent chocolate. I'm not usually much for chocolate flavored things (I prefer just straight chocolate), but this one really takes the cake. (Takes the cake, get it?) Unfortunately, they don't share their super secret recipe, so I did some hunting of my own, and found you this Too Much Chocolate Cake (is there any such thing?) recipe that gets rave reviews on allrecipes.com and won first prize at the creator's county fair. So, because I am in a sharing mood, you can get in on the fun!

Too Much Chocolate Cake

INGREDIENTS:

  • 1 (18.25 ounce) package devil's food cake mix
  • 1 (5.9 ounce) package instant chocolate pudding mix
  • 1 cup sour cream
  • 1 cup vegetable oil
  • 4 eggs
  • 1/2 cup warm water
  • 2 cups semisweet chocolate chips

DIRECTIONS:

  1. Preheat oven to 350 degrees F (175 degrees C).
  2. In a large bowl, mix together the cake and pudding mixes, sour cream, oil, beaten eggs and water. Stir in the chocolate chips and pour batter into a well greased 12 cup bundt pan.
  3. Bake for 50 to 55 minutes, or until top is springy to the touch and a wooden toothpick inserted comes out clean. Cool cake thoroughly in pan at least an hour and a half before inverting onto a plate If desired, dust the cake with powdered sugar.
Original recipe here. Also, if you'd rather make your frosting from scratch, you can use this recipe. :-) You're welcome!

Friday, October 9, 2009

Ultimate Chocolate Chip Cookie


It's been rainy and cold here for the last several days, and weather like this always makes me want to bake. Most of the time I default to this delicious chocolate chip recipe. I found it on another blog, but it is originally from this allrecipes.com recipe. If you like your cookies chewy and soft (and huge!) then you will LOVE this recipe. Make sure to follow it exactly, and remember, more chocolate is always a good thing! ;-)

Ultimate Chocolate Chip Cookie

Ingredients
2 cups all-purpose flour
1/2 teaspoon baking soda
1/2 teaspoon salt
3/4 cup unsalted butter,
melted
1 cup packed brown sugar
1/2 cup white sugar
1 tablespoon vanilla extract
1 egg
1 egg yolk
2 cups semi-sweet
chocolate chips (I only used about 1 cup - 2 seems excessive)

Directions
Preheat the oven to 325 degrees F (165 degrees C). Grease cookie sheets or line with parchment paper.
Sift together the flour, baking soda and salt; set aside.

In a medium bowl, cream together the melted butter, brown sugar and white sugar until well blended. Beat in the vanilla, egg, and egg yolk until light and creamy. Mix in the sifted ingredients until just blended. Stir in the
chocolate chips by hand using a wooden spoon. Drop cookie dough 1/4 cup at a time onto the prepared cookie sheets. Cookies should be about 3 inches apart.

Bake for 15 to 17 minutes in the preheated oven, or until the edges are lightly toasted. Cool on baking sheets for a few minutes before transferring to wire racks to cool completely.


Oh, and my favorite tip for keeping cookies soft and chewy? Put them on a plate or in a container with a piece of bread. The bread will get all hard and stale, but the cookies will be perfect. These are amazing, and Lover (hater of all things sweet, except for me, of course) likes them a lot.

Linked to Hooked on Fridays. What are you hooked on?

Sunday, September 27, 2009

Freezer Meals Menu


We have a huge freezer in the basement that came with our castle. In fact, I think it was installed the day the house was built, because there is no way that it would fit through the basement kitchen door, now that the basement has been remodeled. It comes in really handy for stocking up on meat sales, freezing fresh fruit and vegetables, and of course, staying stocked up on ice cream. ;-)

Lover and I sat down the other day and decided on a list of a few easy meals that freeze well that we would like to keep stocked in the freezer. Here's what we came up with.
  • Chicken Marsala - This is the easiest, and yummiest meal ever, and great for guests. No. of portions: 4 (guest sized)
  • Lasagna - Is there anything that freezes better than this? Yum. No. of portions: 4 square pans
  • Fajitas - this meal keeps ridiculously well in the freezer, and is so simple to make up. No. of portions: 4
  • Quesadillas - Lover makes THE best quesadillas in the world. We test froze some and they held up great. No. of portions: 2
  • Stir Fry Chicken - If the chicken is all seasoned and ready, then making up a meal of stir fry is a piece of cake. Portions: 4
  • Spinach Dip - Once again, this is Lover's domain (have I mentioned that my husband is a gourmet cook?) Portions: 8 small dishes
  • Pizza - Homemade pizza. Best. Ever. Portions: 4
There are a few other ingredients that need to be frozen along with these meals to make the meal complete:
  • 1 package fajita tortillas
  • 2 baguettes
  • Ciabatta bread, made into garlic bread for the spinach dip (about 16 mini loaves)
Along with all of this, we like to keep the freezer stocked with:
  • A bunch of cooked, seasoned chicken breasts that can be easily thawed for chicken salad, quesadillas, etc.
  • Shredded cheese (mozzarella and cheddar)
  • Butter
  • Vanilla Ice Cream (for all those desserts that are made scrumptious by a scoop of vanilla)
  • Peppers and Onions (Sliced and in meal sized portions)
  • Strawberries (for desserts and smoothies)
  • Bananas (sliced, for smoothies and banana bread)
  • Several packages of hot dog and hamburger buns
Last week I listed my goals for fall and stocking the freezer was one of the goals. Hopefully I will be able to get this done soon! :-)

What about you? What do you keep stocked in your freezer? Besides ice cream of course. :-)

Wednesday, August 26, 2009

How to make Weekly Meal Plans


Image taken from here


If you're anything like me, figuring out what to make for dinner each night can be quite the struggle. After a few years of "fulltime" cooking, I've come up with a pretty foolproof plan that eliminates the 4pm meltdown of "what's for dinner?"

There are a few things that make meal planning easier:


  • Stocked pantry (items you regularly use in meals, such as cream of mushroom soup)

  • Freezer large enough to stock up on meat (when meats go on sale)

  • Crockpot (for those days when it is just too busy or too hot to cook)

  • Grocery Database (to track sales and prices... it'll save you money!)


First, look at your calendar and determine how many meals you will need to make this week, as well as any notes about what those meals should be.


Image taken from here


For us, this week is a little busy, but we don't have anything major going on. Monday thru Wednesday we have an event at church every evening, so meals need to be quick and simple in order to make it on time. Thursday, Lover has a meeting over dinner, so he won't be home, and we may be going camping next weekend, which means that meals need to be campfire appropriate.

If we were having someone over for dinner, I would make a note of that, and if we had plans to go out to eat I'd put that into the plan as well.

Usually, I end up with 4-5 meals over a week's time, or 8-10 meals over a two week period. (which is how I usually make my meal plans)

Now I am going to take a look at my stocked meats and frozen foods. Do I have anything that needs to be used up? There's some beef in there that is nearing its expiration date, so I'll put that on the menu. Nothing else is reaching its past due point, so anything is fair game. (Get it? Fair game? Tee hee) I'll also look at sales this week for meat. Chicken is on sale for $1.79/lb at my local store, so I know I'll be stocking up on chicken. I make a note to include several chicken meals this week.

Next I will go through my recipes, noting any favorites that look appealing, as well as any new recipes that I've been wanting to give a try. This is where I also ask Lover if he has any "cravings" for the week. He usually answers "Mexican" so I'll include fajitas on one of my days this week.

Next I make up my grocery list, while consulting my pantry, freezer and fridge to determine what ingredients I'll need to make the meals this week. This is when I also write down items needed for lunches throughout the week.

Instead of assigning a meal to each specific day, I simply post a list of the "weekly meals" somewhere on the fridge. This allows me to choose whatever meal I am in the mood for on a particular day. My meals for this week are:


  • Chicken Caesar Salad

  • Fajitas

  • Beef Burgandy (in the crockpot)

  • Barbecue Chicken and Grilled Veggies

  • Chicken Pasta Salad (my new recipe to try this week)


So, in conclusion, our steps are:


  1. Check your calendar to see how your social activities will affect your meal plan.

  2. Determine how many meals you will need to make.

  3. Check stocked meats for expiration, and sales for bargain meat.

  4. Go through recipes and decide on your required number of meals for the week.

  5. Make shopping list, after checking pantry, fridge and freezer for supplies.

  6. Go shopping

  7. Assign a meal to each day, if you prefer.